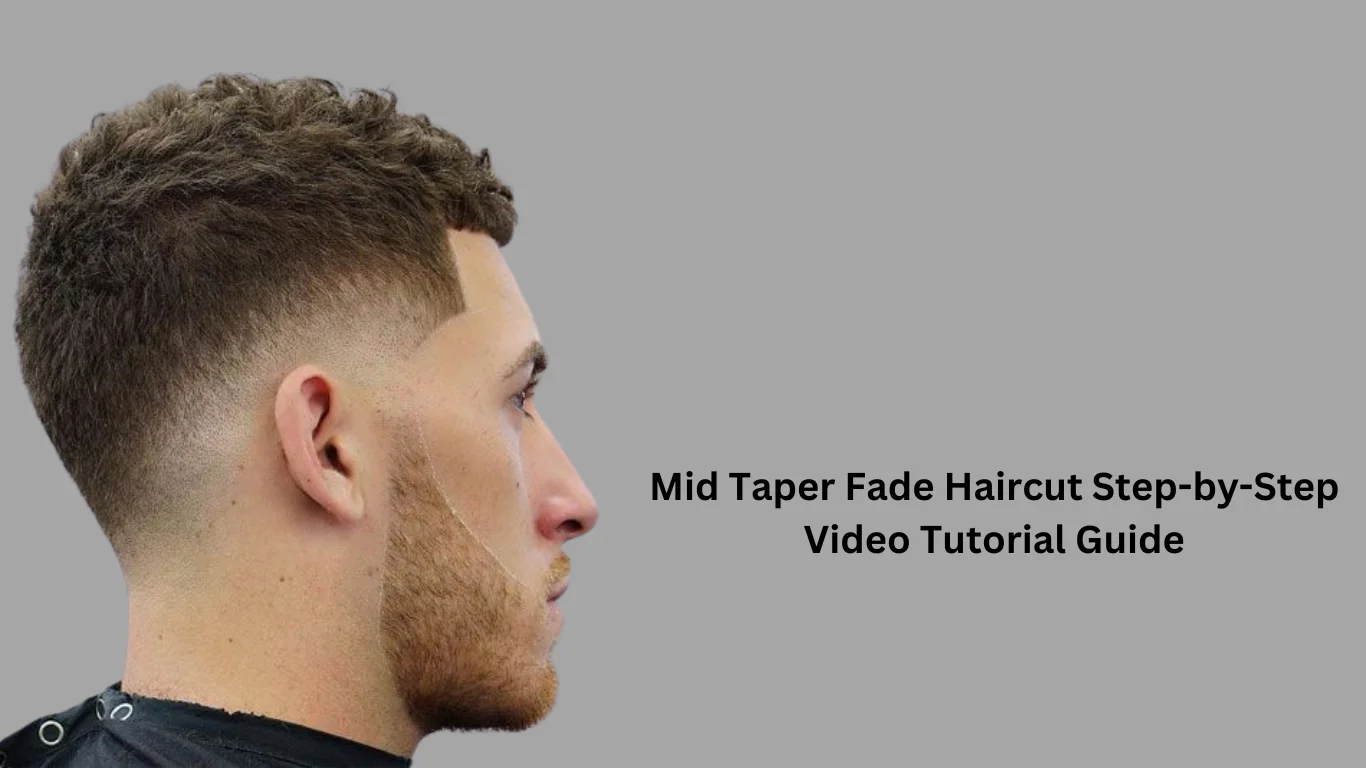
Mid Taper Fade Haircut Step-by-Step Video Tutorial Guide

The mid-taper fade haircut is a versatile and stylish choice that’s perfect for anyone who wants a clean and modern look. It works well for casual and professional settings, offering a balanced blend of sophistication and edge. This blog post will guide you through creating a mid-taper fade haircut, breaking it down into easy-to-follow steps. If you’re new to cutting hair or just looking for a way to master this popular hairstyle, this guide is for you.
What Is a Mid-Taper Fade?
The mid-taper fade is a haircut where the hair gradually transitions from longer lengths on top to shorter lengths on the sides and back. The fade starts midway down the sides of the head, offering a balanced look between low and high tapers. This style suits all hair types and face shapes, making it one of the most versatile haircuts available.
Tools You’ll Need
Before starting, make sure you have the proper tools:
Clippers: Needed for trimming and creating the fade on the sides.
Scissors: Refining the top and adding texture.
Comb: To help section and guide the hair.
Trimmer: For precise detailing and lining up edges.
Hair clips: Useful for sectioning longer hair.
Cape: To keep the client or yourself clean during the cut.
Mirror: A handheld or wall mirror to check the cut from all angles.
Step-by-Step Video Tutorial Guide
Step 1: Prepare the Hair
Start by washing the hair to remove any oils or product buildup.
Dry the hair thoroughly with a towel or blow dryer.
Comb the hair to detangle and smooth it out.
Step 2: Section the Hair
Use a comb and hair clips to divide the hair into sections.
Clip the top section out of the way to focus on the sides and back first.
Step 3: Set the Initial Guideline
Attach the appropriate guard to your clippers (usually #3 or #4).
Start at the midway point on the sides and back, moving upward in smooth motions.
Keep the clippers flat against the head to create a consistent guideline.
Step 4: Create the Taper
Switch to a shorter guard (like #1 or #2) to blend the lower part of the hair.
Work from the bottom up, stopping just below the initial guideline.
Use a flicking motion to avoid harsh lines.
Step 5: Blend the Fade
Use a guard between the two lengths (like #1.5) to blend the transition area.
Focus on smoothing out any visible lines or uneven spots.
Repeat this process around the head, ensuring symmetry.
Step 6: Line Up the Edges
Use a trimmer to clean up the edges around the hairline, ears, and neckline.
Create sharp, precise lines for a polished look.
Be gentle to avoid irritation.
Step 7: Refine the Top
Unclip the top section and decide on the desired length and style.
Use scissors to trim and shape the top, blending it into the sides.
For textured looks, use point-cutting techniques to add dimension.
Step 8: Final Touches
Use a mirror to look at the haircut from all sides.
Make any adjustments needed to ensure an even and smooth fade.
Dust off loose hair and style as desired.
Styling the Mid Taper Fade
The beauty of the mid taper fade is its versatility. You can style it in various ways, such as:
Slick back: Use a pomade or gel for a sleek and professional appearance.
Messy look: Apply a matte paste for a casual, tousled vibe.
Side part: Comb the hair to one side for a classic and timeless style.
Textured quiff: Use a volumizing product to create height and texture.
Common Mistakes to Avoid
Harsh Lines: Always use a blending guard to create smooth transitions.
Uneven Taper: Check symmetry frequently to ensure a balanced fade.
Overcutting: Take your time and trim gradually to avoid cutting too much hair.
Skipping Preparation: Always clean and section the hair properly before starting.
Why Choose a Mid Taper Fade?
Universally Flattering: Complements all hair types and face shapes.
Low Maintenance: Easy to style and maintain between cuts.
Professional & Casual: Works for every occasion.
Trendy Yet Timeless: Offers a modern look with classic roots.
FAQs
Q: How often should I get a mid taper fade haircut?
A: To keep your mid taper fade looking sharp, get it trimmed every 2–3 weeks.
Q: Can I do a mid taper fade on curly hair?
A: Absolutely! The mid taper fade works wonderfully on curly hair, adding contrast and structure.
Q: Is it hard to do a mid taper fade at home?
A: While it requires practice, following a detailed guide like this one can help you achieve great results at home.
Watch the Full Video Tutorial
For a complete demonstration, check out our step-by-step video tutorial. Seeing the process in action will help you visualize each step and refine your technique.
Conclusion:
The mid taper fade haircut is a fantastic choice for anyone looking for a stylish and versatile hairstyle. By following this step-by-step guide, you can achieve a professional-quality fade at home or in a salon. Remember, the more you practice, the better you’ll get, so keep improving your skills over time. Now it’s your turn! Grab your tools and give the mid taper fade a try. Make sure to share your results and experiences in the comments below. Happy cutting!


